Circuit Board Component Identification: How to Identify PCB Components by Markings, Shape, and Codes
Circuit board component identification means recognizing PCB parts by their reference designators, physical appearance, body markings, polarity marks, package type, and electrical function. The fastest way to identify a component is to start with the PCB silkscreen, match the reference letter to a component type, inspect its shape and package, read any value or top marking, then confirm the result with a datasheet, schematic, BOM, or measurement tool. This guide explains how to identify common PCB components such as resistors, capacitors, inductors, diodes, transistors, MOSFETs, ICs, connectors, fuses, relays, crystals, and test points. It also includes practical examples, common marking codes, polarity clues, mistakes to avoid, and a replacement sourcing checklist.
What Is Circuit Board Component Identification?
Circuit board component identification is the process of recognizing the parts mounted on a printed circuit board, also called a PCB. These parts may include resistors, capacitors, inductors, diodes, transistors, MOSFETs, integrated circuits, connectors, fuses, crystals, relays, sensors, and many other electronic components.
In most cases, PCB components can be identified by combining several clues:
- The reference designator printed on the PCB
- The physical shape, size, color, and package
- The number of pins or terminals
- The body marking or value code printed on the part
- Polarity marks or pin-1 indicators
- The circuit area where the part is located
- Measurements from a multimeter, LCR meter, or other test equipment
- Datasheets, schematics, BOMs, or manufacturer documentation
Component identification is useful in many real-world situations. Engineers may need it during debugging, reverse engineering, repair, board bring-up, replacement sourcing, or failure analysis. Buyers and maintenance teams may need it when a component is damaged, obsolete, unmarked, or no longer available from the original manufacturer.
However, it is important to understand one limitation: visual inspection can often identify the component type, but it may not always identify the exact manufacturer part number. For example, a small black three-pin SMD device may be a transistor, MOSFET, voltage regulator, reset IC, or diode array. A black 8-pin IC may be an op amp, EEPROM, regulator, driver, timer, or microcontroller. To confirm the exact part, you usually need the marking, package, pinout, circuit context, and datasheet.
Start with PCB Reference Designators
The first thing to check is the PCB silkscreen. This is the white, black, or yellow text printed on the circuit board. It usually includes reference designators such as R12, C5, U3, D1, Q7, or L2.
A reference designator is not the component part number. Instead, it tells you the component category and its unique position on the board. For example, R15 means the fifteenth resistor on the board, while C8 means the eighth capacitor.
The letter identifies the component type, and the number identifies the specific location.
Common PCB Reference Designators
| PCB Marking | Component Type | What It Usually Means |
| R | Resistor | Limits current, divides voltage, sets gain, or provides pull-up/pull-down resistance |
| C | Capacitor | Stores charge, filters noise, decouples power, or stabilizes signals |
| L | Inductor | Stores energy in a magnetic field, often used in filters and power supplies |
| D | Diode | Allows current to flow mainly in one direction |
| LED | Light-emitting diode | Emits light and has polarity |
| Q / TR | Transistor or MOSFET | Switches or amplifies electrical signals |
| U / IC | Integrated circuit | Performs logic, power, sensing, control, amplification, communication, or memory functions |
| F | Fuse | Protects the circuit from overcurrent |
| FB | Ferrite bead | Suppresses high-frequency noise or EMI |
| J / CN / P | Connector | Provides board-to-wire, board-to-board, or external connection |
| SW / S | Switch | Provides manual, mechanical, or electronic switching |
| X / Y / XTAL | Crystal or oscillator | Provides a clock signal or frequency reference |
| TP | Test point | Exposed pad used for measurement or debugging |
| RV / VR | Variable resistor or potentiometer | Provides adjustable resistance |
| RT / TH | Thermistor | Changes resistance with temperature |
| K / RL | Relay | Electrically controlled mechanical switch |
| T | Transformer | Transfers energy between circuits, often in power supplies |
| B / BT | Battery | Provides backup or portable power |
| M | Motor | Converts electrical energy into mechanical movement |
Reference designators are especially useful when a component has no visible marking. For example, many ceramic SMD capacitors have no value printed on them. If the PCB says C22, you at least know the part is a capacitor. You can then check the schematic, BOM, circuit location, or compare it with a known board.
How to Identify Components by Physical Appearance
If the silkscreen is missing, damaged, or hard to read, the next step is to inspect the component’s physical appearance. Shape, color, size, package style, and pin count can provide strong clues.
Resistors
Resistors are among the most common PCB components. Their main job is to limit current, divide voltage, set bias points, or control signal levels.
Through-hole resistors are usually small cylindrical parts with colored bands. These bands represent resistance value and tolerance. For example, a resistor with brown, black, orange, and gold bands is typically 10 kΩ with 5% tolerance.
SMD resistors are usually small rectangular parts. They are often black, dark gray, or blue with silver-colored terminals at both ends. Many SMD resistors have a three-digit or four-digit code printed on top, such as 103, 472, or 1001.
Some very small resistors, especially in 0201 or 0402 packages, may have no marking at all. In that case, the value must be confirmed from the BOM, schematic, or measurement.
Capacitors
Capacitors store and release electrical energy. They are commonly used for filtering, decoupling, timing, coupling, and power stabilization.
Electrolytic capacitors are usually cylindrical cans. They often have the capacitance and voltage printed directly on the body, such as 100 µF 25 V. They are polarized, which means they must be installed in the correct direction. A stripe on the body usually marks the negative side.
Ceramic capacitors may appear as small disc-shaped through-hole parts or small rectangular SMD parts. SMD multilayer ceramic capacitors, also called MLCCs, are often tan, beige, brown, or gray. Most small MLCCs do not have printed markings.
Tantalum capacitors are often rectangular SMD parts and are usually polarized. Unlike aluminum electrolytic capacitors, tantalum capacitors often mark the positive side rather than the negative side, so always check the datasheet and PCB polarity markings.
Inductors
Inductors store energy in a magnetic field. They are commonly used in switching regulators, filters, power supplies, RF circuits, and EMI suppression.
Through-hole inductors may look like small coils of wire or resistor-like parts with color bands. SMD inductors are often gray, black, or metallic blocks. Larger power inductors may look like square or rectangular molded components near a DC-DC converter IC.
On a PCB, inductors are often labeled L1, L2, or similar. Ferrite beads may look similar to small resistors or inductors but are usually labeled FB.
Diodes
Diodes allow current to flow mainly in one direction. They are used for rectification, reverse-polarity protection, voltage clamping, signal switching, and ESD protection.
Through-hole diodes are usually cylindrical glass or plastic parts with a band at one end. The band usually marks the cathode. Common examples include rectifier diodes, signal diodes, Zener diodes, and Schottky diodes.
SMD diodes may be black, glass-colored, or very small rectangular packages. They may have a line, dot, or short marking code. Because different diode types can look similar, the exact type should be confirmed by the body marking, package, circuit function, and datasheet.
Transistors and MOSFETs
Transistors and MOSFETs are used for switching, amplification, voltage regulation, level shifting, and power control.
Through-hole transistors often have three leads and a D-shaped plastic body, such as TO-92 packages. Power transistors and MOSFETs may use packages such as TO-220, TO-247, DPAK, or D2PAK, often with a metal tab for heat dissipation.
SMD transistors are commonly found in SOT-23, SOT-223, SOT-89, DFN, or similar packages. They often have three pins, but not every three-pin SMD component is a transistor. It could also be a regulator, voltage detector, dual diode, MOSFET, or sensor.
On the board, transistors are commonly labeled Q or TR. The top marking may be a short code rather than the complete part number, so package and circuit context matter.
Integrated Circuits
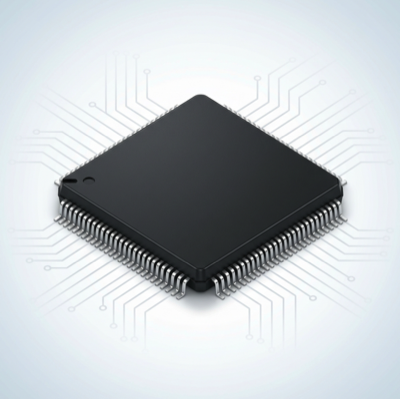
Integrated circuits, or ICs, are usually black rectangular or square packages with multiple pins. They may perform many functions, including logic, voltage regulation, sensing, memory storage, signal conversion, motor control, communication, timing, or processing.
ICs are usually marked U or IC on the PCB. Common packages include SOIC, SOP, SSOP, TSSOP, QFP, QFN, DFN, BGA, DIP, and SOT-style packages.
Look for a dot, notch, chamfer, or other pin-1 indicator. This tells you how the chip is oriented. The text on top of the package may include a manufacturer logo, short marking code, lot code, date code, or partial part number.
ICs are often the hardest PCB components to identify because the printed marking is not always the full manufacturer part number. Many SMD chips use shortened package markings. For a deeper process, read our detailed guide: IC Top Marking Codes Explained: How to Identify SMD Chips from Package Markings.
Connectors
Connectors provide electrical connections between the PCB and cables, modules, batteries, displays, sensors, or other boards.
They may be labeled J, CN, P, or CON on the PCB. Common connector types include pin headers, USB connectors, JST connectors, FFC/FPC connectors, terminal blocks, coaxial connectors, board-to-board connectors, and card-edge connectors.
Connector identification often depends on pitch, number of pins, orientation, locking style, current rating, and mechanical footprint. Even if two connectors look similar, they may not be interchangeable.
Fuses
Fuses protect circuits from excessive current. They are often placed near the power input and labeled F1, F2, or similar.
A fuse may look like a small glass tube, ceramic block, green radial component, or SMD rectangular part. Some resettable fuses, also called PTC fuses or polyfuses, are yellow, green, or orange.
To check a fuse, use continuity mode on a multimeter after the circuit is safely powered off and discharged.
Crystals and Oscillators
Crystals and oscillators provide clock signals for microcontrollers, communication chips, RF circuits, and timing systems.
They are usually labeled X, Y, XTAL, or OSC. A crystal may appear as a small metal can with two leads or a small SMD metal package. Oscillator modules often have four pins and may include a printed frequency such as 16.000 MHz or 25.000 MHz.
Relays
Relays are electrically controlled switches. They are often larger rectangular components with several pins and may be labeled K or RL.
Relays are common in industrial control boards, power switching circuits, automotive electronics, and safety systems. The relay body often includes coil voltage, contact rating, and manufacturer part number.
How to Read Component Markings and Value Codes
After identifying the component type, the next step is to read any value code or body marking. This is especially important for resistors, capacitors, diodes, transistors, and ICs.
SMD Resistor Codes
Many SMD resistors use a three-digit or four-digit code.
For a three-digit code, the first two digits are the significant figures, and the third digit is the number of zeros.
Examples:
| Code | Calculation | Value |
| 100 | 10 × 10⁰ | 10 Ω |
| 101 | 10 × 10¹ | 100 Ω |
| 102 | 10 × 10² | 1 kΩ |
| 103 | 10 × 10³ | 10 kΩ |
| 104 | 10 × 10⁴ | 100 kΩ |
| 472 | 47 × 10² | 4.7 kΩ |
For a four-digit code, the first three digits are the significant figures, and the fourth digit is the number of zeros.
Examples:
| Code | Calculation | Value |
| 1000 | 100 × 10⁰ | 100 Ω |
| 1001 | 100 × 10¹ | 1 kΩ |
| 4701 | 470 × 10¹ | 4.7 kΩ |
| 1002 | 100 × 10² | 10 kΩ |
For low-value resistors, the letter R is often used as a decimal point. For example, 4R7 means 4.7 Ω, and R10 means 0.10 Ω.
Some precision resistors use EIA-96 codes, which require a separate lookup table. Very small resistors may have no marking at all.
Capacitor Codes
Capacitor codes often use picofarads as the base unit. A three-digit code works similarly to resistor codes: the first two digits are the significant figures, and the third digit is the multiplier.
Examples:
| Code | Calculation | Value |
| 101 | 10 × 10¹ pF | 100 pF |
| 102 | 10 × 10² pF | 1,000 pF = 1 nF |
| 103 | 10 × 10³ pF | 10,000 pF = 10 nF |
| 104 | 10 × 10⁴ pF | 100,000 pF = 100 nF = 0.1 µF |
| 105 | 10 × 10⁵ pF | 1,000,000 pF = 1 µF |
| 474 | 47 × 10⁴ pF | 470 nF |
Electrolytic capacitors usually print the value and voltage directly, such as 47 µF 16 V. Ceramic SMD capacitors often have no marking, especially in small sizes.
Diode Markings
Diodes may have a band, stripe, dot, or short code. The band usually indicates the cathode. The PCB may also show a diode symbol or line that matches the cathode side.
However, the marking alone may not tell you whether the component is a standard diode, Schottky diode, Zener diode, TVS diode, or switching diode. To identify the exact part, check the body code, package, circuit position, voltage rating, and datasheet.
Transistor and MOSFET Markings
Small transistors and MOSFETs often use short SMD codes, such as two or three characters. These codes are not always unique. The same code may be used by different manufacturers for different parts.
To identify a transistor or MOSFET, combine:
- Reference designator, usually Q or TR
- Package type, such as SOT-23, SOT-223, or TO-220
- Pin count
- Top marking
- Circuit location
- Pinout
- Datasheet comparison
For example, a three-pin device near a microcontroller GPIO line may be a small signal transistor, while a larger three-pin device near a power input may be a MOSFET or regulator.
IC Package Markings
IC top markings may include the part number, shortened marking code, manufacturer logo, date code, lot code, assembly code, or pin-1 indicator. Some larger ICs have enough space for a readable part number. Smaller SMD chips may only have two to five characters.
If you need to identify an unknown IC, do not rely only on the printed code. Check the package, pin count, circuit function, nearby components, power pins, and manufacturer marking data. For a detailed step-by-step method, see our article on IC top marking codes and SMD chip identification.
How to Identify Polarity and Pin Orientation
Many PCB components must be installed in the correct direction. Reversing a polarized component can cause malfunction, overheating, leakage, or permanent failure.
Common Polarity and Orientation Clues
| Component | Polarity or Orientation Clue |
| Diode | Band usually marks the cathode |
| LED | Flat edge, shorter lead, larger internal plate, or PCB +/− marking |
| Electrolytic capacitor | Stripe usually marks the negative side |
| Tantalum capacitor | Marking often indicates the positive side |
| IC | Dot, notch, chamfer, bevel, or pin-1 mark |
| Connector | Pin 1 triangle, square pad, notch, keyed housing, or numbering |
| Battery | + and − symbols on the holder or PCB |
| MOSFET / transistor | Pinout depends on package and datasheet |
| Bridge rectifier | Usually marked with +, −, and AC symbols |
IC orientation deserves special attention. Pin 1 may be marked by a dot, notch, groove, chamfered corner, or silkscreen symbol. The PCB footprint may also have a square pad or pin-1 mark.
When replacing a component, always match the orientation to the original part, the PCB silkscreen, and the datasheet. Do not assume that all packages follow the same orientation rules.
Step-by-Step PCB Component Identification Workflow
When you are dealing with an unknown board, follow a systematic process instead of guessing.
1. Take Clear Photos of the PCB
Photograph both sides of the board in good lighting. Use a macro lens, phone close-up mode, USB microscope, or magnifying glass if needed. Make sure the reference designators and body markings are readable.
2. Locate the Reference Designator
Find the letters and numbers printed near the component. Examples include R4, C12, D2, U7, Q1, L3, F1, or J5. The letter tells you the component category.
3. Match the Letter to the Component Type
Use the reference designator table to determine whether the part is likely a resistor, capacitor, diode, IC, transistor, inductor, fuse, connector, or test point.
4. Inspect the Package and Shape
Look at the component’s size, shape, color, number of pins, and mounting style. Is it through-hole or surface mount? Does it have two terminals, three pins, many pins, or a metal tab?
5. Read the Body Marking
Check for numbers, letters, logos, bands, polarity marks, or value codes. For small SMD parts, a USB microscope may be necessary.
6. Check Polarity and Orientation
Look for diode bands, capacitor stripes, IC pin-1 marks, connector notches, and PCB +/− symbols. This is critical before replacing or reinstalling parts.
7. Test the Component When Possible
Use a multimeter, LCR meter, ESR meter, diode mode, or continuity mode to verify the component. Be aware that in-circuit measurements may be affected by surrounding components.
8. Confirm with Documentation
If available, check the schematic, BOM, service manual, board layout, datasheet, or manufacturer documentation. For replacement sourcing, confirm the exact part number, package, rating, pinout, and lifecycle status.
Common Examples of Circuit Board Component Identification
The examples below show how different clues work together.
| What You See | Likely Component | How to Confirm |
| R12 beside a small black SMD part marked 103 | 10 kΩ SMD resistor | Use resistor code or measure resistance |
| R5 marked 0 or 000 | Zero-ohm resistor or jumper | Check continuity and circuit function |
| C8 beside a tan rectangular part with no marking | MLCC ceramic capacitor | Check BOM, schematic, or capacitance meter |
| C3 cylindrical can marked 100 µF 25 V | Electrolytic capacitor | Confirm value, voltage, and polarity |
| D2 black package with a band | Diode | Band marks cathode; test with diode mode |
| LED1 small clear or colored part | Light-emitting diode | Check polarity and forward voltage |
| Q1 three-pin SOT-23 device | Transistor or MOSFET | Check marking, pinout, and circuit location |
| U4 black 8-pin chip | Integrated circuit | Read top marking, package, and pinout |
| L1 large gray block near switching IC | Power inductor | Check DC-DC converter circuit |
| FB2 small two-terminal part near signal or power line | Ferrite bead | Check EMI filtering position |
| F1 near power input | Fuse | Test continuity |
| J3 multi-pin plastic housing | Connector | Measure pitch and check pin count |
| X1 metal can marked 16.000 | Crystal or oscillator | Confirm frequency and package |
| TP6 round exposed copper pad | Test point | Used for probing, not usually a replaceable part |
| K1 rectangular block with contact rating | Relay | Check coil voltage and contact rating |
These examples show why no single clue is enough. A reliable identification usually combines the reference designator, physical package, marking, location, and measurement.
How to Identify Burnt or Unmarked PCB Components
Burnt, cracked, or unmarked components are harder to identify. In many repair cases, the printed marking may be destroyed, and the PCB silkscreen may be partially damaged. You need to rely on circuit context.
Here are practical methods to identify a damaged component.
Check the Reference Designator
Even if the component is destroyed, the PCB may still show R, C, D, Q, U, L, F, or another designator. This gives you the component category.
Compare with Repeated Circuit Sections
Many boards have repeated channels. For example, motor drivers, LED channels, input protection circuits, audio channels, and power rails may use the same component layout multiple times. If one section is damaged, compare it with an identical undamaged section.
Look at the Surrounding Circuit
A burnt part near the power input may be a fuse, TVS diode, rectifier, MOSFET, inrush limiter, or regulator. A damaged part near an IC pin may be a resistor, capacitor, ESD diode, or signal protection device. Context helps narrow the possibilities.
Search by Board Number or Product Model
Some PCBs have a board number, revision code, or product model printed on them. Search for the board number, service manual, schematic, or replacement board photos.
Use Measurements Carefully
If the component is still partially intact, you may be able to measure resistance, diode behavior, or continuity. However, damaged components can give misleading readings, and in-circuit measurements may include parallel paths.
Avoid Blind Replacement
Do not replace a burnt component only by guessing its appearance. A wrong value, wrong voltage rating, wrong pinout, or wrong polarity can damage the board again. In many cases, the original failure may have been caused by another upstream or downstream fault.
Tools You Can Use for PCB Component Identification
You do not always need advanced equipment, but the right tools make identification much easier.
Magnifying Glass or USB Microscope
Useful for reading small SMD markings, inspecting solder joints, checking polarity marks, and confirming pin counts.
Multimeter
A multimeter can measure resistance, continuity, diode forward voltage, voltage rails, and basic electrical behavior. It is one of the most important tools for PCB repair and component identification.
LCR Meter
An LCR meter measures inductance, capacitance, and resistance. It is useful for identifying capacitors and inductors, especially when markings are missing.
ESR Meter
An ESR meter is useful for testing electrolytic capacitors, especially in power supplies. High ESR can indicate capacitor aging or failure.
Bench Power Supply
A current-limited bench power supply can help test a circuit safely during troubleshooting. Always use proper current limits to avoid further damage.
Thermal Camera or Freeze Spray
These tools help find overheating components or intermittent faults.
Datasheets and Manufacturer Documentation
Datasheets confirm the package, pinout, ratings, marking, electrical characteristics, and operating conditions.
BOM, Schematic, or Board Layout
The BOM and schematic are the most reliable sources for exact component identification. If they are not available, board photos, markings, and measurements become more important.
Mistakes to Avoid When Identifying PCB Components
Component identification is not only about recognizing shapes. Many parts look similar but behave very differently. Avoid these common mistakes.
Mistake 1: Treating the Reference Designator as the Part Number
R12, C5, and U3 are board position labels, not manufacturer part numbers. They tell you where the component is and what category it belongs to.
Mistake 2: Assuming All Three-Pin SMD Parts Are Transistors
Many three-pin SMD parts are transistors, but some are MOSFETs, voltage regulators, reset ICs, dual diodes, voltage references, or sensors.
Mistake 3: Trusting IC Top Markings Without Context
Small ICs often use abbreviated top markings. The same marking may appear on different parts from different manufacturers. Always confirm package, pin count, pinout, and circuit function.
Mistake 4: Ignoring Polarity
Diodes, LEDs, electrolytic capacitors, tantalum capacitors, ICs, connectors, and batteries may all require correct orientation. Reversing polarity can cause failure.
Mistake 5: Measuring Components In-Circuit Without Caution
Surrounding components can affect measurements. A resistor may appear lower in value because another path is connected in parallel. A capacitor may not measure correctly unless removed from the circuit.
Mistake 6: Replacing Components with Similar-Looking Parts
Similar appearance does not guarantee the same value, rating, pinout, or function. Always check electrical specifications before replacement.
Mistake 7: Ignoring the Cause of Failure
If a component is burnt, it may be the result of another fault. Replacing only the visibly damaged part may not solve the root problem.
Replacement Sourcing Checklist
Identifying the component type is only the first step. If you need to source a replacement, you must confirm that the new component is electrically and mechanically compatible.
Before selecting a replacement, check the following:
| Requirement | Why It Matters |
| Component type | A resistor, capacitor, diode, transistor, MOSFET, and IC are not interchangeable |
| Exact value | Resistance, capacitance, inductance, frequency, or logic function must match |
| Package | The replacement must fit the PCB footprint |
| Pinout | Same package does not always mean same pin arrangement |
| Voltage rating | Replacement must handle the circuit voltage |
| Current rating | Important for fuses, connectors, inductors, diodes, MOSFETs, and regulators |
| Power rating | Resistors, MOSFETs, regulators, and power ICs must dissipate heat safely |
| Tolerance | Affects precision, sensing, timing, and analog circuits |
| Temperature range | Critical for industrial, automotive, outdoor, and power applications |
| Polarity | Required for diodes, LEDs, electrolytic capacitors, tantalum capacitors, and ICs |
| ESR / ripple current | Important for capacitors in power supplies |
| Switching speed | Important for diodes, MOSFETs, logic ICs, and communication circuits |
| Lifecycle status | Avoid replacing an obsolete part with another hard-to-source part |
| RoHS status | Required for compliance-sensitive applications |
| Manufacturer availability | Helps reduce sourcing risk and lead time |
For simple passive parts, a replacement may be straightforward if the value, tolerance, package, voltage rating, and temperature rating match. For ICs, MOSFETs, sensors, regulators, and communication chips, the replacement must be checked much more carefully.
If you are identifying a part for repair or procurement, provide as much information as possible: clear PCB photos, reference designator, top marking, package size, number of pins, circuit location, board model, and any visible damage.
Quick PCB Component Identification Cheat Sheet
| Component | Visual Clue | Common Marking | Key Check | Common PCB Marking |
| Resistor | R | Small cylinder or SMD rectangle | Color bands, 103, 472, 4R7 | Resistance and tolerance |
| Capacitor | C | Can, disc, or tan SMD rectangle | 104, 105, µF/V rating | Capacitance, voltage, polarity |
| Inductor | L | Coil or molded block | Value code or no marking | Inductance and current rating |
| Diode | D | Two-terminal part with band | Band, short code | Cathode direction and diode type |
| LED | LED | Clear or colored diode | Color or polarity mark | Forward voltage and polarity |
| Transistor | Q / TR | Three-pin package | Short SMD code | Pinout and device type |
| MOSFET | Q | Three-pin or power package | Short code or full part number | Voltage, current, RDS(on), pinout |
| IC | U / IC | Multi-pin black package | Top marking, logo, date code | Package, pinout, function |
| Fuse | F | Glass, ceramic, or SMD block | Current rating or code | Continuity and current rating |
| Ferrite bead | FB | Small two-terminal SMD part | Often no marking | Impedance and current rating |
| Connector | J / CN / P | Plastic or metal connector | Pin numbers or brand | Pitch, pin count, orientation |
| Crystal | X / Y | Metal can or SMD metal package | Frequency marking | Frequency and load capacitance |
| Relay | K / RL | Larger rectangular block | Coil voltage, contact rating | Coil and contact specifications |
| Test point | TP | Exposed pad | TP number | Measurement location |
FAQ
What do R, C, D, Q, and U mean on a circuit board?
R usually means resistor, C means capacitor, D means diode, Q usually means transistor or MOSFET, and U usually means integrated circuit. These letters are reference designators. The number after the letter identifies the specific component location on the PCB.
Is the number printed on the PCB the same as the component part number?
No. A marking such as R12, C5, D3, or U7 is a reference designator, not a manufacturer part number. It tells you the component’s position and category on the board. The actual part number may be printed on the component body, listed in the BOM, or shown in the schematic.
How do I identify an unknown SMD component?
Start with the PCB reference designator. Then check the package, size, pin count, body marking, polarity marks, and surrounding circuit. Use a microscope or magnifier if needed. Finally, confirm the identification with a datasheet, schematic, BOM, or measurement tool.
What does 103 mean on an SMD resistor?
The code 103 means 10 × 10³ ohms, which equals 10,000 ohms or 10 kΩ. In a three-digit resistor code, the first two digits are the significant figures and the third digit is the number of zeros.
What does 104 mean on a capacitor?
The code 104 means 10 × 10⁴ picofarads, which equals 100,000 pF. This is the same as 100 nF or 0.1 µF.
How can I identify IC pin 1?
IC pin 1 is usually marked by a dot, notch, groove, chamfered corner, bevel, or PCB silkscreen indicator. Some PCB footprints also use a square pad for pin 1. Always confirm the orientation with the datasheet when replacing an IC.
Can I identify every circuit board component from a photo?
No. A photo can often help identify the component type, package, polarity, and visible marking, but it may not confirm the exact manufacturer part number. For exact identification, you may need the schematic, BOM, datasheet, board model, measurements, or manufacturer marking database.
How do I identify a burnt component on a PCB?
Start with the reference designator if it is still visible. Then compare the damaged area with similar repeated circuit sections, inspect nearby components, search by board number, and check the circuit function. Avoid replacing a burnt component by appearance alone because the original failure may have been caused by another fault.
What information should I provide when sourcing a replacement component?
Provide clear photos of the PCB and component, the reference designator, body marking, package size, number of pins, board model, circuit location, and any known electrical requirements. For ICs, include the top marking and package type. For passive parts, include value, tolerance, voltage rating, and size if known.
Why do some SMD components have no markings?
Very small SMD components often have no markings because there is not enough space on the package. Ceramic capacitors, ferrite beads, and small resistors may be unmarked. In these cases, identification usually requires the BOM, schematic, measurement, or comparison with a known board.
Conclusion
Circuit board component identification is a practical skill that combines visual inspection, PCB reference designators, component markings, package recognition, polarity clues, and electrical testing. The best starting point is usually the PCB silkscreen. A label such as R, C, D, Q, U, L, F, or J can quickly tell you the component category.
From there, inspect the component’s shape, size, color, pin count, and body marking. Use resistor and capacitor code rules when applicable, check diode and capacitor polarity marks, and pay close attention to IC orientation and top markings. For ICs and small SMD chips, remember that top markings are often abbreviated and may not be complete part numbers.
When a component is burnt, unmarked, obsolete, or difficult to source, do not rely on appearance alone. Confirm the value, package, voltage rating, current rating, pinout, polarity, lifecycle status, and compatibility before choosing a replacement.
A systematic approach helps reduce repair errors, sourcing risk, and component mismatch problems. Whether you are troubleshooting a damaged board, reverse engineering a circuit, or finding a replacement part, accurate PCB component identification is the first step toward a reliable solution.

Related Articles

PNP vs NPN vs P-Channel MOSFET: How to Choose the Right Transistor for Switching Circuits

What Is a Field Effect Transistor? FET Types, Working Principle, Applications, and Selection Guide
RF Transceiver vs RF Module vs RF Switch: What Is the Difference?
